The Muses Preset Pack
Last time, we went through the options for the versatile and expressive hairy brushes. This time, we’ll discuss the brush set I’ve created for the "Muses" training DVD. Creating the brush set has been an enriching experience. Together with David Revoy and Timothee Giet, we created a standard for brush sets -- and we have also created a SVG library with modular vector icons that are easy to adapt and use. Check out Vasco Basque’s brush set, too.
So, without further ado: the Krita Training Vol.2: Muses Brush Set is here! The DVD is coming along nicely, and the contents will be on the printer on Monday 30 of September!
Krita makes it really easy to create brush presets and if we don’t take care, we’ll create hundreds of presets. Managing so many presets is rather more difficult than 42, the number of presets of this pack. It pays to be selective!
This pack cover the basic necessities for the most painting projects. The set I created for "Muses" was created made to complement the default set and also to be compatible with another packs, like David Revoy’s pack. Although both packs have some things in common, I think that they complement each other very well. Each has some functionality that isn’t present in the other.
The Muses Pack focuses on providing a rich and varied painting experience with a traditional look.
The set is designed for being used with tablet. It’s not necessary to have a tablet but I don’t recommend using a mouse because some presets can work in a unexpected ways because they use sensors like pressure or tilt. For the best experience, use a tablet that has tilt since some presets use the "Ascension" parameter.
Contents of the set:
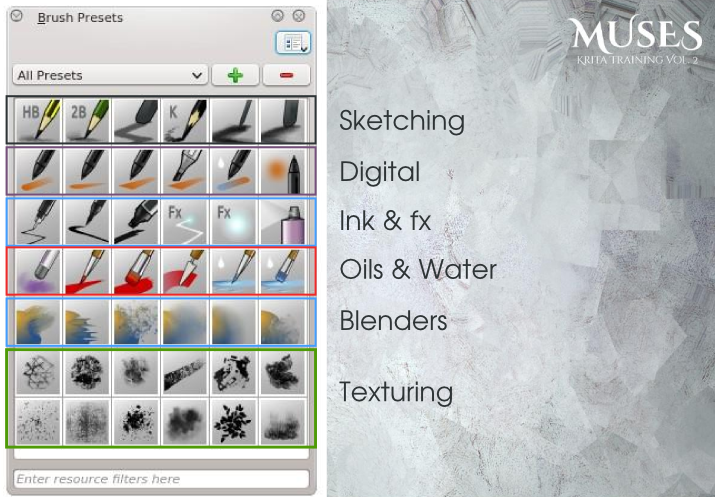
The colors of the squares are only for differentiating the parts, they don't have nothing to be with the colour coding we designed for distinguishing the presets.
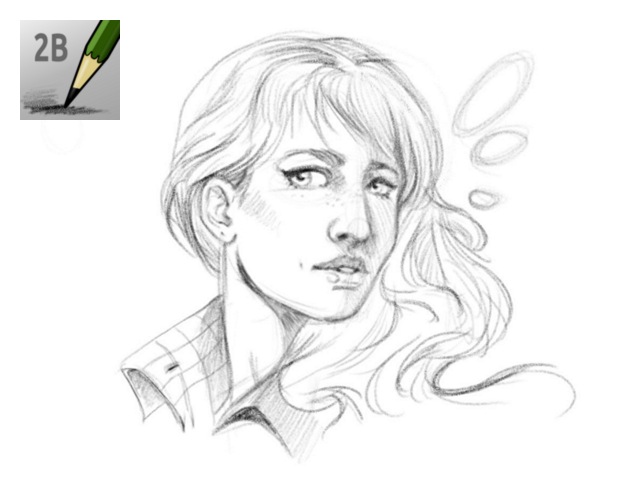
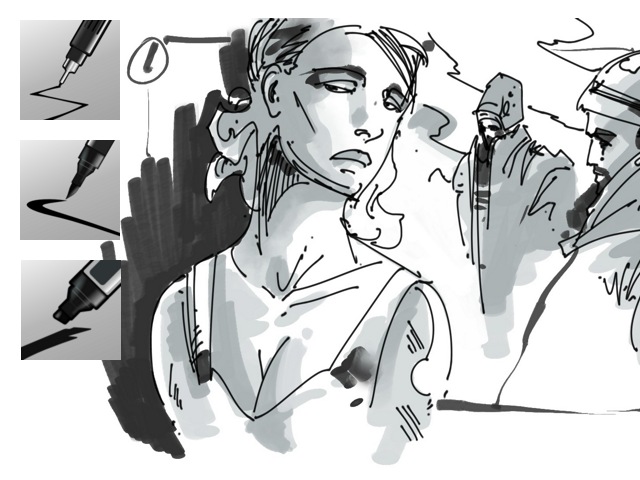
- Sketching: This first part of the set covers the sketching and dry techniques phases like pencil, charcoal and hard pastel. Usually you’d use these presets in black and white, but the advantage of the digital painting is that with only one preset you can still use all the colors you want, for instance to simulate the effect of color pencils.
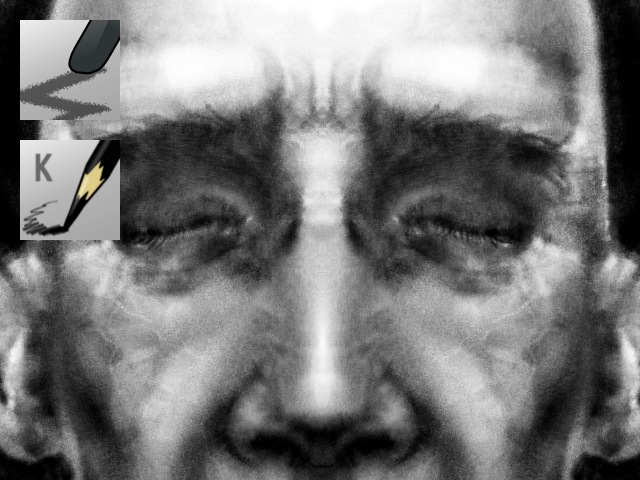
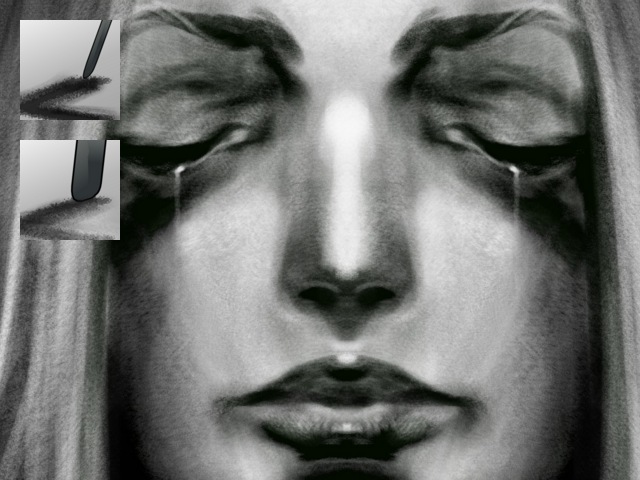
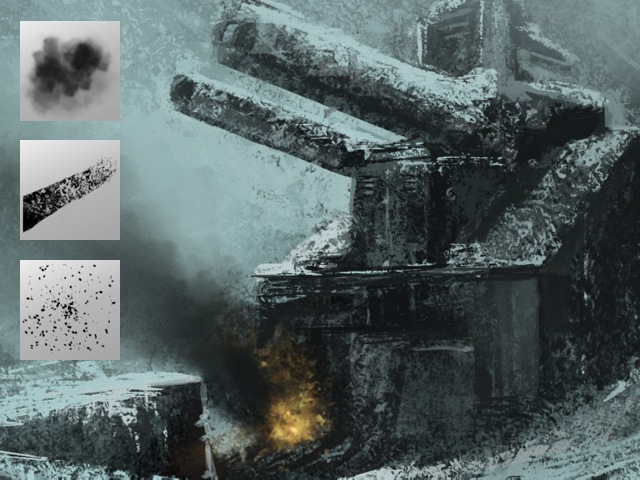
- Digital: This part of the set covers the most common presets that you need for digital painting. The classic round brushes with a good velocity in bigger sizes, smooth contour, squared… The illustration of below, for example, makes an extensive use of the squared brush for creating the structures of the mountain. After that, you will have to do a detailing finish, of course, but is a fast way for delimiting the contours. Personally, I use these presets all the time.

- Ink & Fx: In principle, this presets aren’t for inking comics (for that see the presets created by Timothee Giet), they are for doing studies or fast sketches. We can emulate the markers technique very easily.
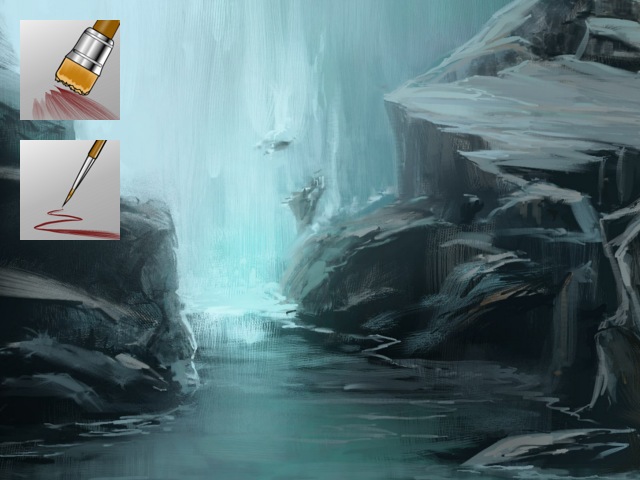
- Oils & water: I use this presets for creating the brushstrokes of wet paint, for giving the painting the look and feel of oil paint and gouache. They create expressive effects and they are fast but I don’t recommend the using them at really big sizes: you can easily saturate the resources of even a beefy computer. They use the "ascension" sensor for the color-rate.

- Blender: This presets mix the color that is applied in the canvas. They are quite explanatory in themselves.
- Texturing: This presets are used for fill big parts of the image with varied shapes like leaves, clouds, etc. They simulate effects that will take a lot of time painting it directly with normal round brush, saving us a lot of time that can be spent on places where we need manual detailing.
- Hair Brush Pack Bonus: If you have installed "Hairy presets set" you can create brush strokes where you can see a pattern of lines that simulate the hairs of the brush. Read my first post for all the details.
Download
The brushkit ZIP can be downloaded here. It should be compatible with 2.7 and 2.8dev License : the brushkit itself and thumbnails is released under the WTFPL 2.0 (compatible with Public Domain and CC-0 ).
Install
Unzip the downloaded zip , and paste the two folders 'brushes' and 'paintoppreset' into your Krita user preference directory. Under Mint 14 KDE, the Krita pref are located here : /home//.kde/share/apps/krita/. On Windows, it will be c:Users\AppDataRoamingkrita or c:Users\AppDataLocalkrita.